
Plasterboard partitions appear to be simple walls, and from the finished side they look straightforward. A smooth, painted surface that divides one space from another. But the process of building a plasterboard partition in a commercial office involves a series of coordinated steps, each of which affects the quality, performance, and longevity of the finished wall. Understanding how these walls are actually constructed helps tenants appreciate why specification and workmanship matter, and why two walls that look identical from the outside can perform very differently in terms of acoustics, durability, and compliance.
The construction of a plasterboard partition follows a consistent sequence: framing, insulation, lining, joining, setting, and finishing. Each stage builds on the previous one, and the quality of the finished wall depends on the care taken at every step. Cutting corners at the framing stage shows up as waviness in the finished surface. Skipping insulation shows up as poor acoustic performance. Rushing the joining and setting shows up as visible cracks and tape lines within months of completion.
The Basic Components of a Plasterboard Partition
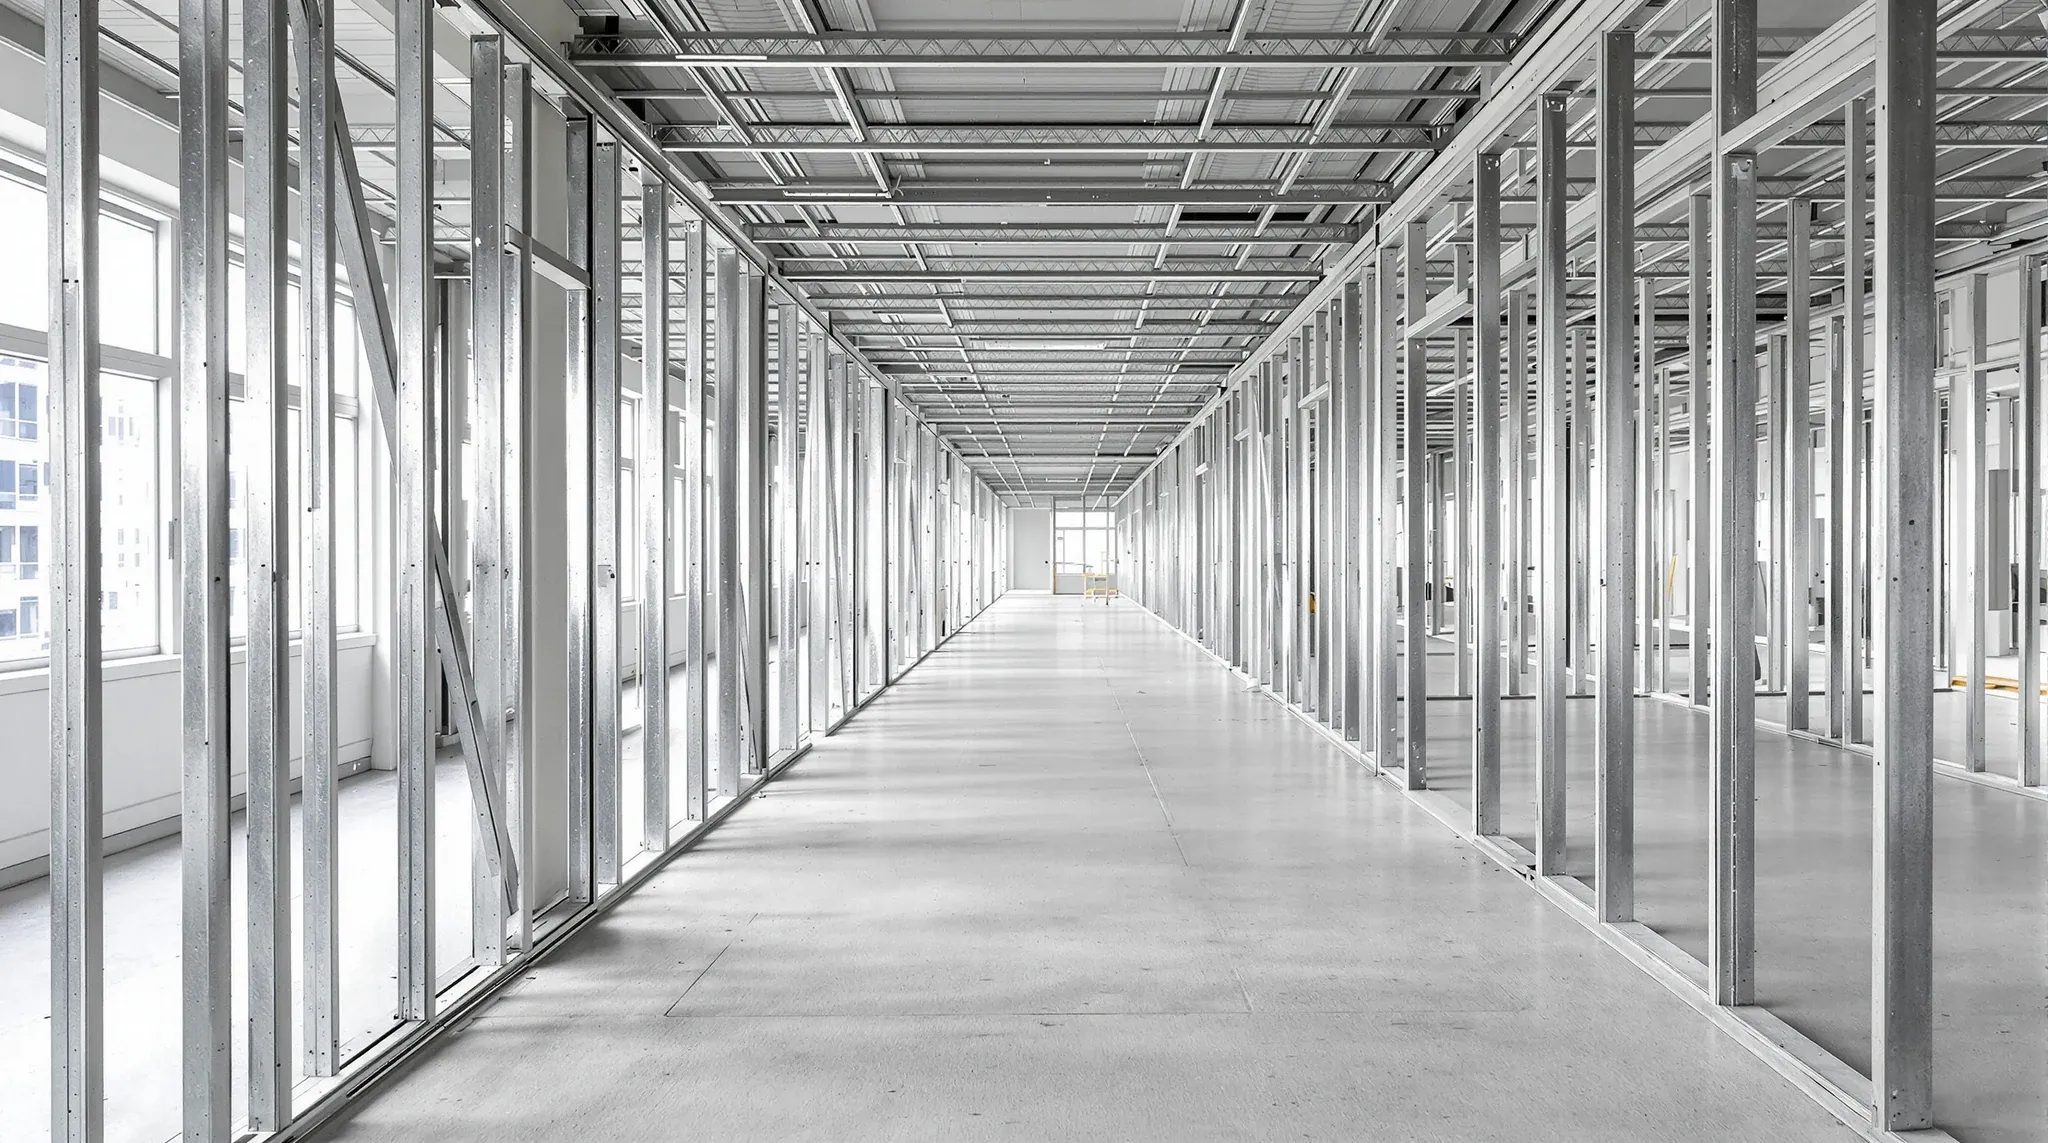
A standard plasterboard partition in a commercial office consists of a steel stud frame, cavity insulation, and plasterboard lining on each side. The steel frame is made up of a bottom track fixed to the floor, a top track fixed to the ceiling or soffit above, and vertical studs spaced at regular intervals between them. The insulation sits in the cavity between the studs, and the plasterboard sheets are fixed to the studs with screws, creating the wall surfaces on each side.
The steel frame is typically made from light gauge galvanised steel, with stud sizes ranging from 51mm to 92mm depending on the wall height, the acoustic or fire requirements, and the loads the wall needs to support. Wider studs provide a deeper cavity for insulation and services, and they are stiffer, which helps maintain straightness over taller wall heights. The track sections, which sit at the top and bottom of the wall, are slightly wider than the studs so the studs can slide into them and be fixed in position.
The plasterboard itself is available in several types, each suited to different requirements. Standard plasterboard is used for general office walls where no special performance is needed. Fire-rated plasterboard uses a denser core and sometimes glass fibre reinforcement to achieve the required fire resistance time. Acoustic plasterboard is heavier and denser than standard board, which improves its ability to block sound transmission. Impact-resistant board uses a toughened face and core for areas where the wall is exposed to physical damage, such as corridors and high-traffic zones.
How the Steel Framing Goes Up
The framing stage is the foundation of the partition, and its accuracy determines the quality of everything that follows. The bottom track is fixed to the floor first, positioned according to the layout drawing and aligned with the ceiling grid and adjacent walls. The top track is then fixed to the ceiling soffit or the underside of the slab, directly above the bottom track. If the wall is located beneath a suspended ceiling, the top track may fix to a supplementary steel member or directly to the slab, depending on the acoustic and fire requirements.
Vertical studs are cut to length and positioned in the tracks at regular centres, typically 600mm for standard walls or 450mm for walls that need additional stiffness or load-bearing capacity. The studs are fixed to the tracks using a crimping tool or self-drilling screws, depending on the specification. Stud spacing must be consistent because the plasterboard sheet edges need to land on stud centres for proper fixing, and any variation in spacing can result in unsupported sheet edges that crack or move over time.
The framing must be plumb and straight, which requires checking with a level at every stud and adjusting as needed before the linings go on. The sequence in which walls go up matters too. In the correct build order for an office fitout, plasterboard framing typically happens after the ceiling grid is established and before most services are run, because the frame positions need to coordinate with the ceiling module and the services need to route through or around the framing.
Insulation and What It Does in the Cavity
Cavity insulation is installed between the studs before the second side of the wall is lined. The insulation is typically glass wool or polyester batts cut to fit the stud cavity, and its primary function is acoustic. Without insulation, the cavity between the two plasterboard sheets acts as a resonant chamber that can actually amplify certain frequencies, making the wall less effective at blocking sound than a solid board without any cavity at all.
With insulation, the cavity absorbs sound energy that passes through the first layer of plasterboard, reducing the amount that reaches the second layer and transmits to the other side. The density and thickness of the insulation affect how much sound is absorbed, with denser batts generally providing better performance. For standard office walls, a medium-density glass wool batt provides adequate acoustic improvement. For walls where acoustic performance is critical, such as meeting rooms and private offices, higher-density batts and more sophisticated framing configurations may be specified.
Insulation also provides a degree of thermal buffering, which can help even out temperature differences between adjacent spaces, and it reduces the hollow sound that uninsulated plasterboard walls produce when knocked. This last point is more significant than it might seem, because the hollow resonance of an empty cavity wall is one of the things that makes a cheap fitout feel cheap, even if the surface finish is good.
Lining, Joining, and Setting the Board
Plasterboard sheets are fixed to the steel studs with self-drilling screws at regular centres, typically 200mm to 300mm depending on the specification. The sheets are positioned so that the joints between adjacent sheets fall on stud centres, and the joints are staggered between the two sides of the wall so that the joins on one side do not align with the joins on the other. This staggering improves the acoustic and structural performance of the wall by ensuring there is no continuous weak line through the full thickness of the assembly.
Once the boards are fixed, the joints are taped and set. Paper tape is embedded in a bed of jointing compound over every joint, then covered with subsequent coats of compound that are sanded smooth between applications. Internal corners are treated similarly, and external corners are reinforced with metal or paper-faced corner beads to protect the edge from impact damage. The setting process typically involves three coats of compound, each wider than the last, feathered to a smooth transition with the surrounding board face.
The quality of the joining and setting is what determines whether the finished wall looks flat and seamless or shows visible ridges, bumps, and tape lines. It is a skill-dependent process, and experienced plasterboard setters produce a markedly better result than less skilled workers. The setting quality is classified in levels, with higher levels requiring more coats, wider feathering, and a smoother finish. Commercial offices typically require a Level 4 or Level 5 finish for painted walls, with Level 5 providing the smoothest result under direct lighting conditions.
How Services Are Integrated During Construction
Electrical, data, and mechanical services are integrated into the plasterboard partition during the construction sequence, typically after the first side of the wall is lined and before the second side is closed. The electrician runs cables through the stud cavities and installs mounting brackets for switches and power outlets. The data cabling contractor routes structured cabling to data plate positions. If the wall needs mechanical penetrations for ductwork or pipework, these are cut and framed before the linings are applied.
The coordination between the plasterboard installer and the services trades is critical. If the services are not installed before the second side of the wall is closed, the wall needs to be cut open to accommodate them, which compromises the acoustic seal and adds rework. If the services trades damage the plasterboard during installation, the repair affects the setting quality. The ideal sequence is first-side lining, services rough-in, insulation, second-side lining, then setting and finishing.
The choice between single-stud and double-stud framing also affects how services are accommodated. Single-stud walls have one set of studs shared by both linings, which limits the cavity depth and can make it difficult to route services without them touching both sheets. Double-stud walls have separate frames for each side, creating a wider cavity with more room for services and better acoustic performance, because the two sides of the wall are structurally independent.
The Finishing Sequence from Tape to Paint
After the joints are set and sanded, the wall undergoes a sequence of finishing steps that bring it to its final painted state. The set compound is checked under raking light to identify any imperfections, and spot repairs are made where needed. A coat of sealer or primer is applied to the full wall surface to equalise the porosity between the set compound and the plasterboard face, which ensures the topcoat paint dries evenly without visible differences in sheen or texture.
The topcoat paint is then applied, typically in two coats, using a roller or spray application depending on the specification and the desired finish. Spray application produces a more even result but requires more masking and protection of adjacent surfaces. Roller application is more practical in occupied or partially completed spaces but can leave a slight orange-peel texture that is visible under certain lighting conditions.
The finishing quality is affected by every preceding stage. If the framing is not straight, the finished wall will show waviness that no amount of paint can disguise. If the setting is not smooth, the paint will highlight the ridges and tape lines. If the sealer is not applied, the paint will absorb differently over the set compound and the board face, creating visible patches. Each stage of the process contributes to the final result, and skipping or rushing any stage compromises the finished quality.
What Separates a Well-Built Partition from a Basic One
From the outside, a well-built plasterboard partition and a basic one can look almost identical immediately after completion. The differences become apparent over time and under demanding conditions. A well-built wall maintains its straightness, resists cracking at joints and corners, provides consistent acoustic performance, and withstands the normal impacts and wear of an occupied office. A basic wall develops cracks, shows tape lines under changing light, transmits more sound than expected, and requires more frequent maintenance to keep it looking presentable.
The quality differences are almost entirely in the details that are invisible once the wall is finished: stud spacing and alignment, insulation installation completeness, screw depth and pattern, tape embedding quality, compound application and sanding, and junction sealing. These are all construction process details rather than material differences, which means the quality of the partition depends on the skill and care of the installation team as much as on the specification of the components.
For tenants, the practical takeaway is that a plasterboard partition specification on paper does not guarantee performance. Impact resistance, acoustic isolation, fire compliance, and visual quality all depend on the construction process being executed to the required standard. Engaging a fitout team with demonstrated plasterboard capability and checking the workmanship at each stage of the process is the most reliable way to ensure the finished walls perform as intended.
If you are planning a fitout and want plasterboard partitions that perform as well as they look, we can manage the full construction process from framing through to final paint, with the quality control that ensures every wall meets the required standard.
Call us on 1300 60 93 93