
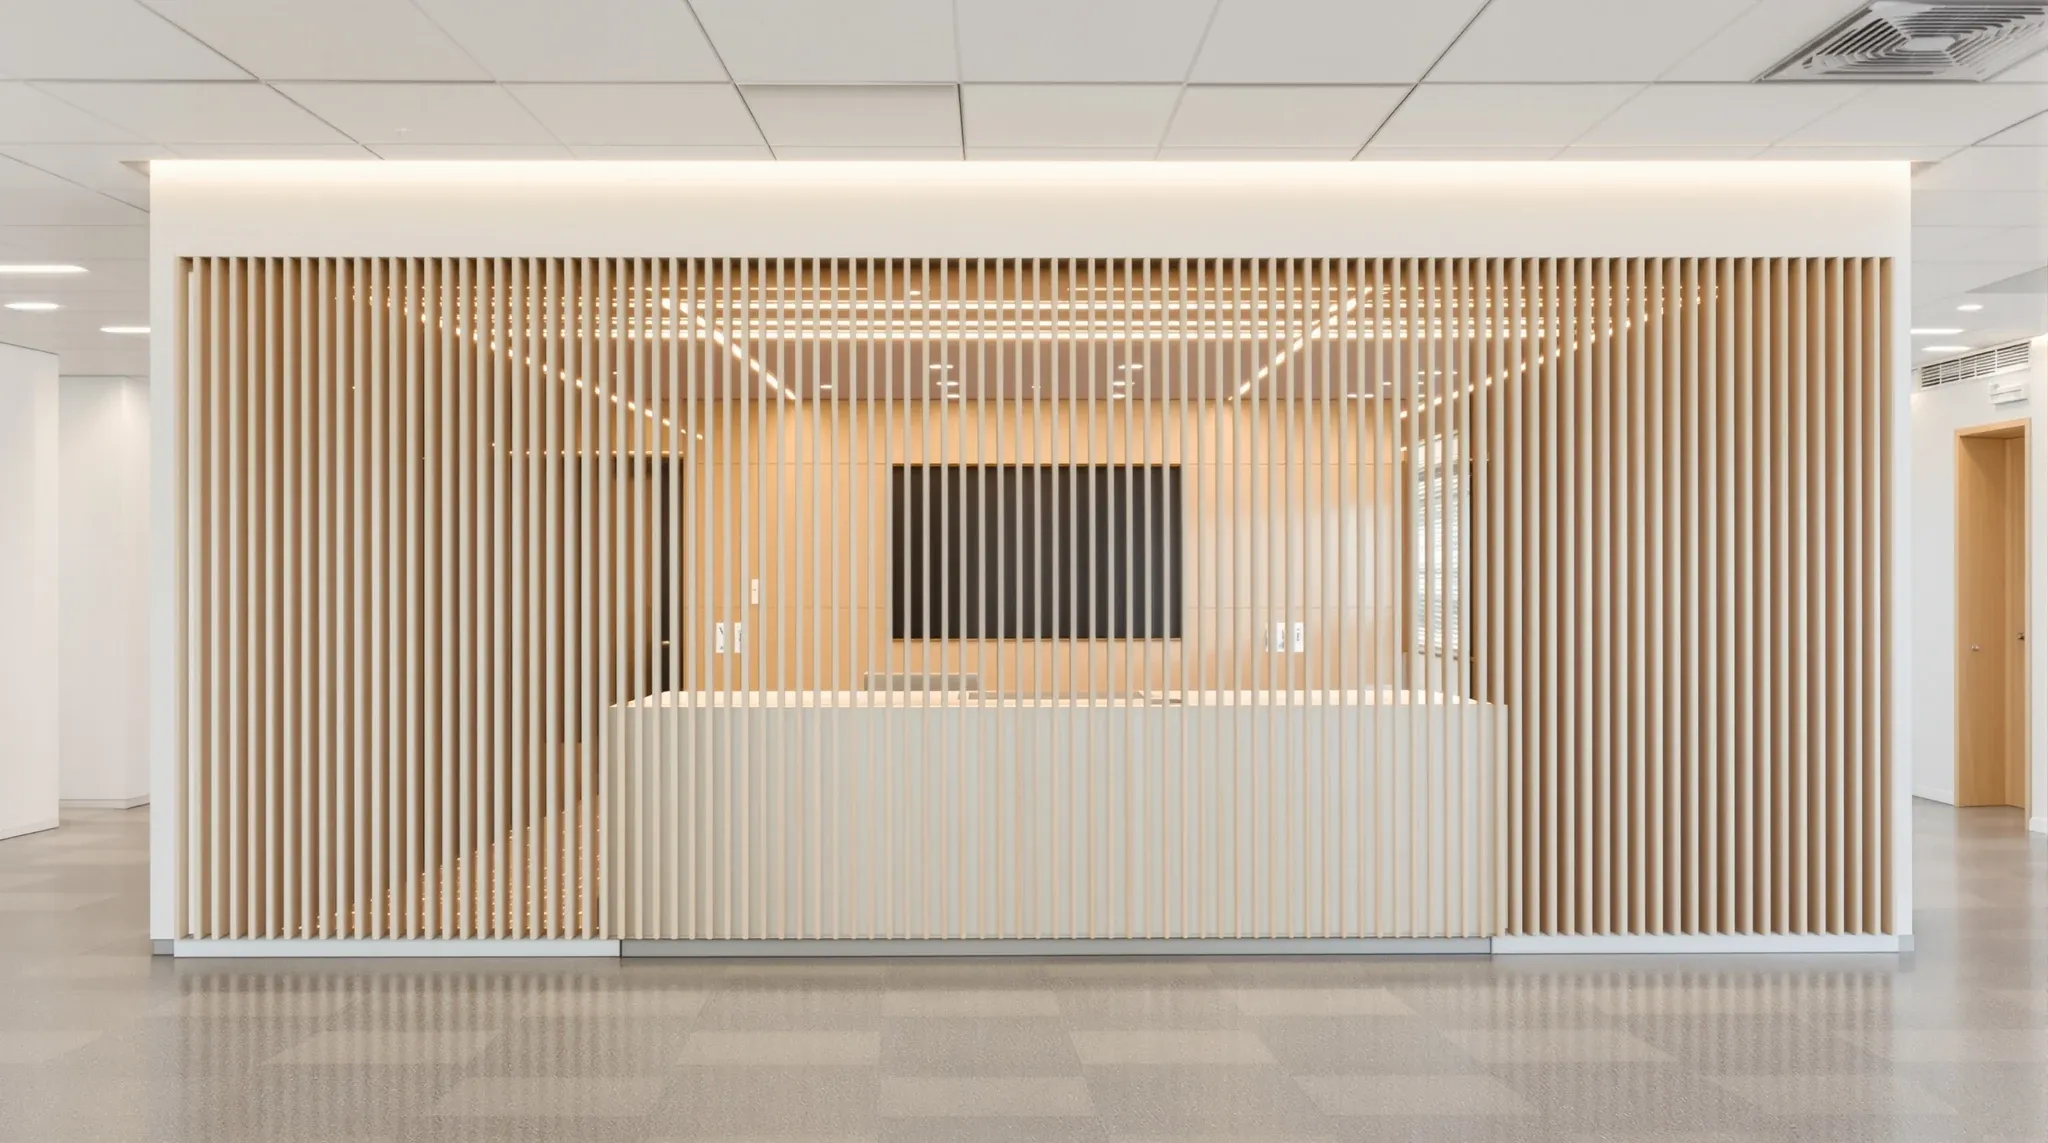
A timber slat wall in an office is a lining on a lining. The slats people see are fixed to a felt or acoustic backing, and that backing is fixed to a flat plasterboard or plywood wall that has to be true, solid where the screws land and closed only after the cables for the lighting have gone in. Almost everything that decides how the finished wall looks and how long it lasts happens on that hidden layer.
What drives the build is the order of trades. The wall behind the slats is a plasterboard job, the light channel and the power are an electrical job roughed in while the framing is open, and the slats go on last against a surface that cannot be corrected once they are up. We build feature walls as part of a whole tenancy and as a single scope in an office that is already trading, and the sequence is the same either way.
What a Slat Wall Is Made Of
There are two families of product on the market, and they ask different things of the wall behind them. Prefinished panels come as veneered MDF slats already glued to a felt backing, typically around 600 millimetres wide and 2.4 to 2.8 metres tall, and they are screwed or glued directly to a flat lining. Batten systems are the other family: solid timber or aluminium battens that click onto an aluminium mounting track screwed to the wall, with a separate acoustic backing slotted into the track behind them.
Panels are quicker and suit a plain backdrop or a corridor wall. Batten systems cost more in labour but allow the spacing, the angle and the batten depth to be set for the project, they turn corners with purpose-made clips and they run around curves. Both rely on a flat substrate, so the choice changes the fixing detail but not the plasterboard wall we build first.
The scope we price is the wall itself: the framing, the lining, the lighting channel, the power and data, and the slats. A reception backdrop without a logo is a complete build in its own right, and where a client wants the brand applied later the signwriter fixes to a wall we have already made ready. The build behind a branded feature wall, with a recessed logo and its own lighting detail, follows the same logic with a few more layers.
The Substrate and the Fixings
Manufacturers of prefinished panels are clear that a new wall needs a flat sheet substrate, and on a stud wall that means plasterboard or plywood, not bare studs. The slats are thin, the felt is soft, and any bow or step in the wall behind them shows as a shadow along the slats when the light rakes across the face. When we set out a plasterboard partition that will carry slats, we straighten the studs, keep the joints flush and skip the final paint coat where the panel will cover it.
Fixing centres matter more than most people expect. One Australian panel supplier specifies 8 gauge by 40 millimetre button head screws at 300 millimetre centres across the panel and 600 millimetre centres along it, driven through the felt between the slats, and asks for glue as well as screws wherever a panel is stacked above another or fixed overhead. Screws driven into plasterboard alone will not hold that pattern, so we set the studs and noggings behind the wall to suit the panel module before the board goes on, or line the wall in plywood so a fixing lands anywhere.
Batten systems shift the load to the track. The standard track is an aluminium extrusion that is screwed to the wall at centres set by the batten weight and the stud spacing, with the manufacturer's guide showing 600 millimetre track centres as typical for interior timber battens on studs at 600 or less. The clips are factory fixed to the track at the batten spacing, so the wall behind has to be plumb and flat enough that every clip sits in the same plane, and we check it with a straight edge before the track goes on.
The acoustic backing is the other reason the wall behind matters. A felt-backed panel fixed hard to plasterboard is quoted by one supplier at a noise reduction coefficient of around 0.6, rising towards 0.95 with an air gap and insulation behind it, and a batten system with a 7 millimetre acoustic backing over a 90 millimetre cavity is quoted at around 0.4, rising above 0.9 once the cavity holds 50 millimetre acoustic batts. Where a client wants the slats to soften a hard reception, we build the cavity and fill it rather than rely on the felt alone.
Fire Group Numbers, Briefly
Wall and ceiling linings in a commercial building are given a group number under the National Construction Code, from Group 1, which performs best in the room fire test, to Group 3, and the number a location needs depends on the building class, whether the building is sprinklered and where in the floor the lining sits. Public corridors and fire-isolated exits sit at the strict end, and an open plan office with a long floor dimension relative to its ceiling height can be treated as a specific area with its own row in the table. The certifier sets the requirement for a given wall, so we treat the number as something to confirm early rather than something to assume.
The reason it comes up on a slat wall is that untreated timber battens are typically supplied as Group 3, and the same batten range is available with a coating that lifts it to Group 1, while aluminium battens in a timber finish sit at Group 1 as standard. Prefinished MDF panels vary by supplier and some do not publish a group number at all, so we ask before the panels are ordered. Buildings without sprinklers also usually carry a smoke test on the lining, so a product acceptable in a sprinklered tower may not suit an older unsprinklered building.
Our part in this is to ask for the test report with the product submittal and to keep the substrate, backing and battens as one tested system where the supplier offers one. Where a location needs a stricter group than the timber can reach, a coated or aluminium batten usually gives the same look, and that swap is far cheaper before the order than after.
Lighting and Power Built into the Wall
Most slat walls in receptions carry light: a strip washing down the slats from a recess at the top, a channel behind a floating panel, or a line of light along a plinth at the bottom. Every one of those needs a cable route and a driver location decided while the wall is framed. The LED strip itself sits in an aluminium profile that is either recessed into the plasterboard behind the slats or set into a rebate at the head, and the driver has to live somewhere it can be reached, usually in the ceiling void above the wall or in an accessible cupboard, never sealed behind the slats.
We rough in the conduit and the driver position before the board is fixed, leave draw strings, and test the strip on a bench before it goes into a profile that will be hard to reach. The colour temperature is chosen against a sample of the timber, because a cool white strip on warm oak makes the slats look grey and a warm strip on a bleached finish turns it yellow.
Power and data points in the wall are the other detail. On a prefinished panel the felt is trimmed with a knife and the slats with a fine saw around a flush box, and the cut looks poor unless the box is set out to fall between slats. On a batten system the outlet sits in a break in the battens with a trim around it. Where the feature wall is also a partition between rooms, every outlet and every strip is a penetration in a wall that may have an acoustic job to do, and the sealing behind plasterboard partitions and penetrations applies before the slats hide it. A screen mounted on the wall needs its own backing, which means plywood or noggings behind the plasterboard set out to the bracket, and the AV display mounting detail is decided at framing, not when the installer arrives with the bracket.
Curves, Corners and Returns
A curved slat wall is two curved builds in one. The plasterboard curve comes first: flexible 6.5 millimetre board, installed in two layers, is rated by its manufacturer to a minimum radius of about 250 millimetres on a convex face and 450 millimetres on a concave face, and the studs are set closer together than on a flat wall so the board follows a fair line rather than a series of flats. The general limits and cost of curved plasterboard walls apply here as they would on a painted wall, with the extra point that the curve has to be fair, because slats magnify every flat spot.
The battens then follow the curve on a flexible track. The manufacturer's curving track is a thinner extrusion that is supplied flexible and needs bracing behind it, with a minimum radius of about 200 millimetres for narrow battens and 400 millimetres for 60 millimetre battens, and it is designed for interior use only. The manufacturer's guide shows the track over a curving ply substrate rather than plasterboard, which is how we detail it: a ply skin cut and fixed to the curved studs, the flexible track screwed through it, and the battens clicked on last so the joint lines stay even around the bend.
External corners are the detail that gives a slat wall away. Prefinished panels butt at a corner and leave a raw edge unless a corner trim is used, while batten systems use a mitred track and a purpose-made corner clip so a batten wraps the corner. Where a wall returns into a corridor, we set the batten module out from the corner so a full batten lands on it and the cut batten falls where the wall meets something else.
Where the Wall Meets the Floor and the Ceiling
The bottom of a slat wall takes the knocks. Cleaners' equipment, delivered boxes and chairs pushed back all land low on the wall, and a felt-backed panel that runs to the floor gets scuffed and picked at. We hold the slats above a skirting or a plinth, or run the batten system's anti-slip trim along the bottom edge so the battens are held and the line is straight. On a batten system the manufacturer's detail shows a skirting below the track, and on a panel wall a recessed plinth, painted dark, does the same job.
The top edge is a set-out problem. Slats look right when they run to a clean line, so we set the wall height and the lighting recess so the slats finish against a shadow line, a bulkhead or the ceiling with a full slat rather than a sliver. Where the slats continue across the ceiling, the wall and the timber feature ceiling are set out together so the batten centres line through the corner, and the ceiling side carries its own access and fire requirements. Where they do not continue, a rebate or a trim at the head reads as intended, while a small gap reads as a mistake.
Keeping the Wall Looking Right
Veneer varies from panel to panel, and the panel suppliers say to match colour before fixing. We lay the panels out on the floor, shuffle them until the run reads evenly, and fix them in that order, because a dark panel beside a pale one cannot be corrected later. Solid timber battens move with the seasons and can be refinished, while veneer panels cannot be sanded and aluminium battens in a timber finish do not need any refinishing.
Day to day, the slats want a damp cloth and the felt between them wants a soft brush or a brush attachment on a vacuum, with care that the hard nozzle does not chip a slat edge. Suppliers rule the panels out of wet and splash zones and keep them clear of direct heat, so the slat wall stops short of a kitchenette splashback. A damaged slat is replaced on a batten system by unclipping it, and on a panel wall by cutting the slat out and gluing a new one to the felt.
The end of the lease is worth a thought at the start. Panels fixed with screws come off cleanly and leave a wall that can be patched and painted, while panels glued with construction adhesive tear the paper face off the plasterboard and the wall usually has to be relined. Where the tenant is likely to remove the feature at make good, we fix with screws and note it on the drawings, so the removal is a morning's work rather than a new wall.
We build timber slat feature walls from the framing out, with the substrate straight, the light channel and the power roughed in before the board is closed, and the slats set out to land clean at every corner, floor and ceiling line.
📞 Call us on 1300 60 93 93