
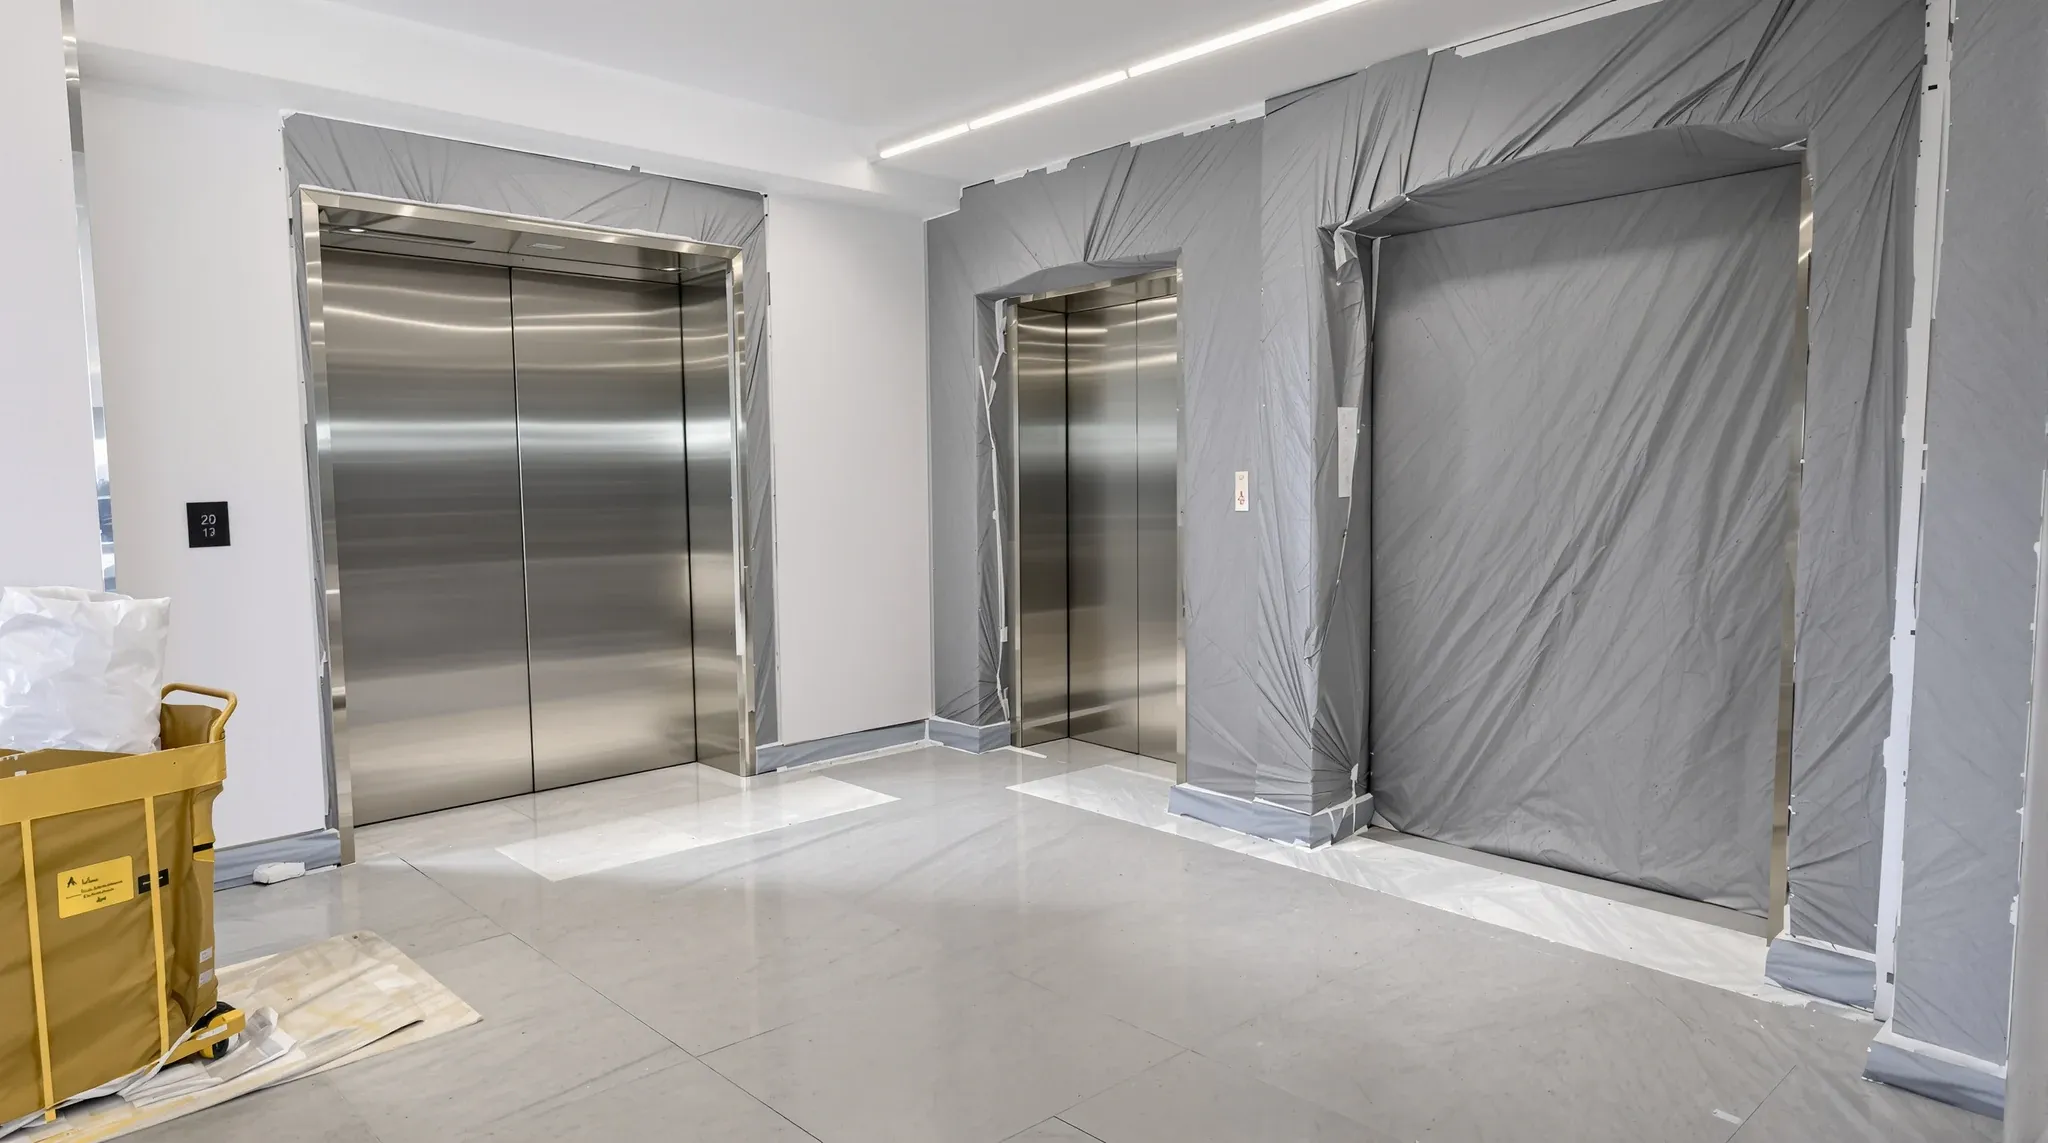
The strip-out at the end of a commercial office lease is the phase where damage to the building happens fastest and costs the most to argue about later. Partitions come down in hours, demolition crews move through corridors with trolleys and debris, and the fabric that belongs to the landlord, the lift lobbies, the common corridors, the risers, the sprinkler heads, the slab edges, sits in the path of the work. Anything that gets scratched, cracked or chipped is a damage recharge item at handback, and the tenant pays for it whether or not the tenant’s crew caused it.
Preventing that bill is almost entirely a matter of protecting the right surfaces before the strip-out starts, documenting the condition before and after, and making the protection visible enough that every subcontractor on site knows what is in scope and what is not. The work is cheap when it happens on day one and expensive when it happens on day fifteen as part of a recharge negotiation.
Where The Recharge Bills Actually Come From
Damage recharges at make good sign-off tend to arrive in a handful of recurring categories. Lift lobby floor tiles chipped by trolley wheels or dropped debris. Scratches and gouges on lift doors from equipment being moved in and out of cars. Damaged exit signage above the tenancy door. Dented or scratched riser doors from demolition traffic. Sprinkler heads clipped by scaffolding or panel edges. Slab edge chips where walls were cut close to the base-building line. Torn carpet in the common corridor from trolleys or offcuts dragged across it. Stained or scratched skirtings along corridors used as debris routes.
Each of these is typically a small dollar value on its own. The recharge at the end of a strip-out often lands in the several-thousand-dollar range in total, occasionally more for premium-grade buildings where the replacement items are specified to a higher standard. The larger problem is that the recharge is assessed by the building manager against what the landlord’s contractor will charge to put right, not against the market cost of the repair, which often lands at a premium to the tenant’s own contractor quote.
The honest read of this is that the landlord is entitled to the repair and to a reasonable margin on arranging it. Arguing the line-by-line charges rarely recovers meaningful value. Preventing the damage is a much more effective strategy than disputing its cost.
Protection Mapping Before Strip-Out Starts
The useful first step is a protection map, produced before the strip-out contractor is on site, that identifies every base-building element in the strip-out’s path and specifies the protection required for each. This is a short document, typically one page of plan and a schedule of protection items, but its absence is the single biggest reason damage happens.
The map covers the route from the tenancy door to the loading dock or building entry, which is where most traffic-related damage occurs. Lift lobby floor protection goes down as plywood or heavy-duty floor covering taped at the edges to stop slipping. Lift cars get quilted corner pads at the door frames and a floor covering inside. Common corridor floors get runners of carpet protection film or ply along the debris route. Riser doors facing the corridor get corrugated cardboard or plywood fixed over the face.
Inside the tenancy, the protection map identifies the base-building elements the tenant’s strip-out will get close to. Sprinkler heads get temporary protective caps. Exit signs inside the tenancy are either removed by the fire contractor for reinstatement later or boxed in during the work. Services running along the slab soffit, typically HVAC ductwork, sprinkler mains, and electrical sub-mains, get marked as no-damage zones with clear signage and, where feasible, physical barriers such as temporary netting or hoarding.
This work adds meaningful time to the first day on site. It also adds roughly one to three per cent to the strip-out cost, which sounds significant until it is compared to the median damage recharge on a tenancy without protection, which typically runs an order of magnitude higher.
Protection That Works Versus Protection That Looks Like Protection
Not all protection is equal, and building managers know the difference. A token layer of thin cardboard taped to a wall does not protect anything; it marks an intention. A layer of plywood mechanically fixed or firmly taped at every edge, covering a surface the trolleys will actually pass against, does protect the surface.
The distinction matters at the handback inspection. If the protection failed during the work, the question becomes whose fault the failure was, and the answer usually lands on the tenant because the protection specification was theirs to get right. A building manager who watched a strip-out operate with clearly inadequate protection will press harder on the damage-recharge items, because the tenant’s care has already been signalled.
Practical tests for adequate protection: corner protection on all internal corners in the debris path, not just the obvious ones; floor protection that stays down when a trolley wheel runs over the edge; lift-car protection that covers the door architrave as well as the walls; signage that reminds workers which surfaces are in the no-touch zone.
Hoarding at the tenancy threshold, where the debris route meets the common corridor, is the highest-impact protection item. A proper hoarding confines dust and debris to the tenancy, prevents the corridor from becoming a waste path, and gives the strip-out contractor a controlled handover to the common area. The cost is modest; the value is high. Managing a defit alongside other works almost always runs more smoothly when the hoarding line is firm from day one.
Dilapidation Photographs As Evidence
Protection prevents damage. Dilapidation photographs resolve disputes about damage that already existed. Before any strip-out work starts, the tenant’s contractor should walk the common areas in the tenancy’s path and photograph the existing condition in detail. Floor tiles, lift interiors, corridor skirtings, riser doors, exit signage, ceiling tiles in the common corridor, slab edges visible at the tenancy boundary.
The photographs are date-stamped and retained in the project records. At handback, if the building manager raises a damage recharge on a surface that was already damaged before strip-out started, the photograph is the evidence that resolves the question. Without the photographs, the tenant is arguing a negative, which rarely succeeds.
The photographic scope is usually a 30-minute walk with a phone camera. It is not a structural survey and does not need specialist input. What matters is coverage; every surface within three metres of the strip-out route, every lift lobby the work will pass through, every shared fire and life safety device the work will get near. Sparse photography is weak evidence. Comprehensive photography is decisive.
Where the tenancy already has a photographic condition report from lease start, the strip-out-day walkthrough is a comparison exercise: confirm that the conditions have not changed, note anything that has, and hold the two records together. This lets the tenant push back specifically on any recharge for damage that pre-existed the strip-out, rather than arguing a general “it was not us” position. A side-by-side photographic record from lease start and strip-out day is the evidence that anchors a sensible conversation with the building manager when make good obligations under a NSW commercial lease get tested at handback.
Handback Condition Extends Beyond The Demised Space
A point tenants often miss is that handback condition obligations can extend beyond the strict boundary of the leased tenancy. The lease typically requires the tenant to leave the common areas, at least along the strip-out route, in the condition they were found. This is not a theoretical point; it is the basis on which the damage-recharge line items get assessed.
Lift lobby condition at handover, corridor condition along the debris route, riser door condition, and the threshold area immediately outside the tenancy door are all in scope. Where the strip-out contractor has been sloppy in any of these zones, the tenant carries the cost, even when the physical damage is well outside the four walls of the leased space.
The practical implication is that the strip-out programme needs a final sweep of the common areas before the work is declared complete. This is not the cleaner’s responsibility; it is the strip-out contractor’s. The sweep covers floor cleaning along the full debris route, removal of all protection materials without damaging the surfaces underneath, repair of any minor marks caused during the work, and restoration of any temporary signage or barriers to their pre-work state.
The same applies to the loading dock and any building service areas used during the strip-out. Dumpster placement, skip loading zones, and the walk between the tenancy and the dock all need to be returned to their pre-work condition. Building managers pay attention to these areas because they are the ones most often used by cleaning staff and other contractors, and damage in them is visible daily.
Sign-Off Before Strip-Out Begins
The most effective process, when a tenant has the time to arrange it, is a joint pre-strip-out walkthrough with the building manager and the strip-out contractor. The walk covers the protection map, the dilapidation photographs, and the agreed debris route. If the building manager has specific concerns, they get raised before work starts; if the protection specification looks inadequate, it gets upgraded.
This walk takes about an hour on a typical tenancy. It produces a short written record, usually an email or a brief letter, that documents what was agreed. That record becomes the baseline for the handback inspection; any recharge item raised at handback has to map against a condition the building manager accepted at the pre-work walk. If there was no pre-work walk, the landlord’s position at handback is unilateral, and the tenant’s counter-arguments rarely change it.
Some building managers will conduct this walk as a matter of course. Some will not, unless asked. Either way, a tenant who initiates the walk, documents it, and runs the strip-out in line with the record is the tenant who receives a modest damage recharge bill, or none at all, when the handback paperwork lands.
The Short Version For Tenants About To Strip Out
Base-building damage at strip-out is preventable. The tools are a protection map produced before work starts, physical protection installed to a standard that actually holds up under working conditions, comprehensive dilapidation photography retained in the project record, and a pre-work walkthrough with the building manager that produces a documented baseline.
Done at the start of the strip-out, this work takes between half a day and two days depending on the size of the tenancy and the length of the debris route. Done at the end, as a damage-recharge dispute, it takes weeks and usually ends with the tenant paying most of the claim. The economics are clear. So is the sequencing.
The sequence matters because the strip-out itself is fast. A medium-sized tenancy can be demolished in two or three working days. The protection has to be in place before the first partition comes down, not while it is happening. Any tenant who treats protection as something the strip-out contractor will handle during the work is underestimating how quickly the work moves and how much damage happens in the first 48 hours when protection is thin.
If you are planning the strip-out at the end of a lease and want the protection scope, the dilapidation photography and the pre-work walkthrough built into the programme from day one, we can help you set that up before the demolition crew arrives. It is the low-cost front end of a good defit and make good that avoids the high-cost back end.
📞 Call us on 1300 60 93 93