
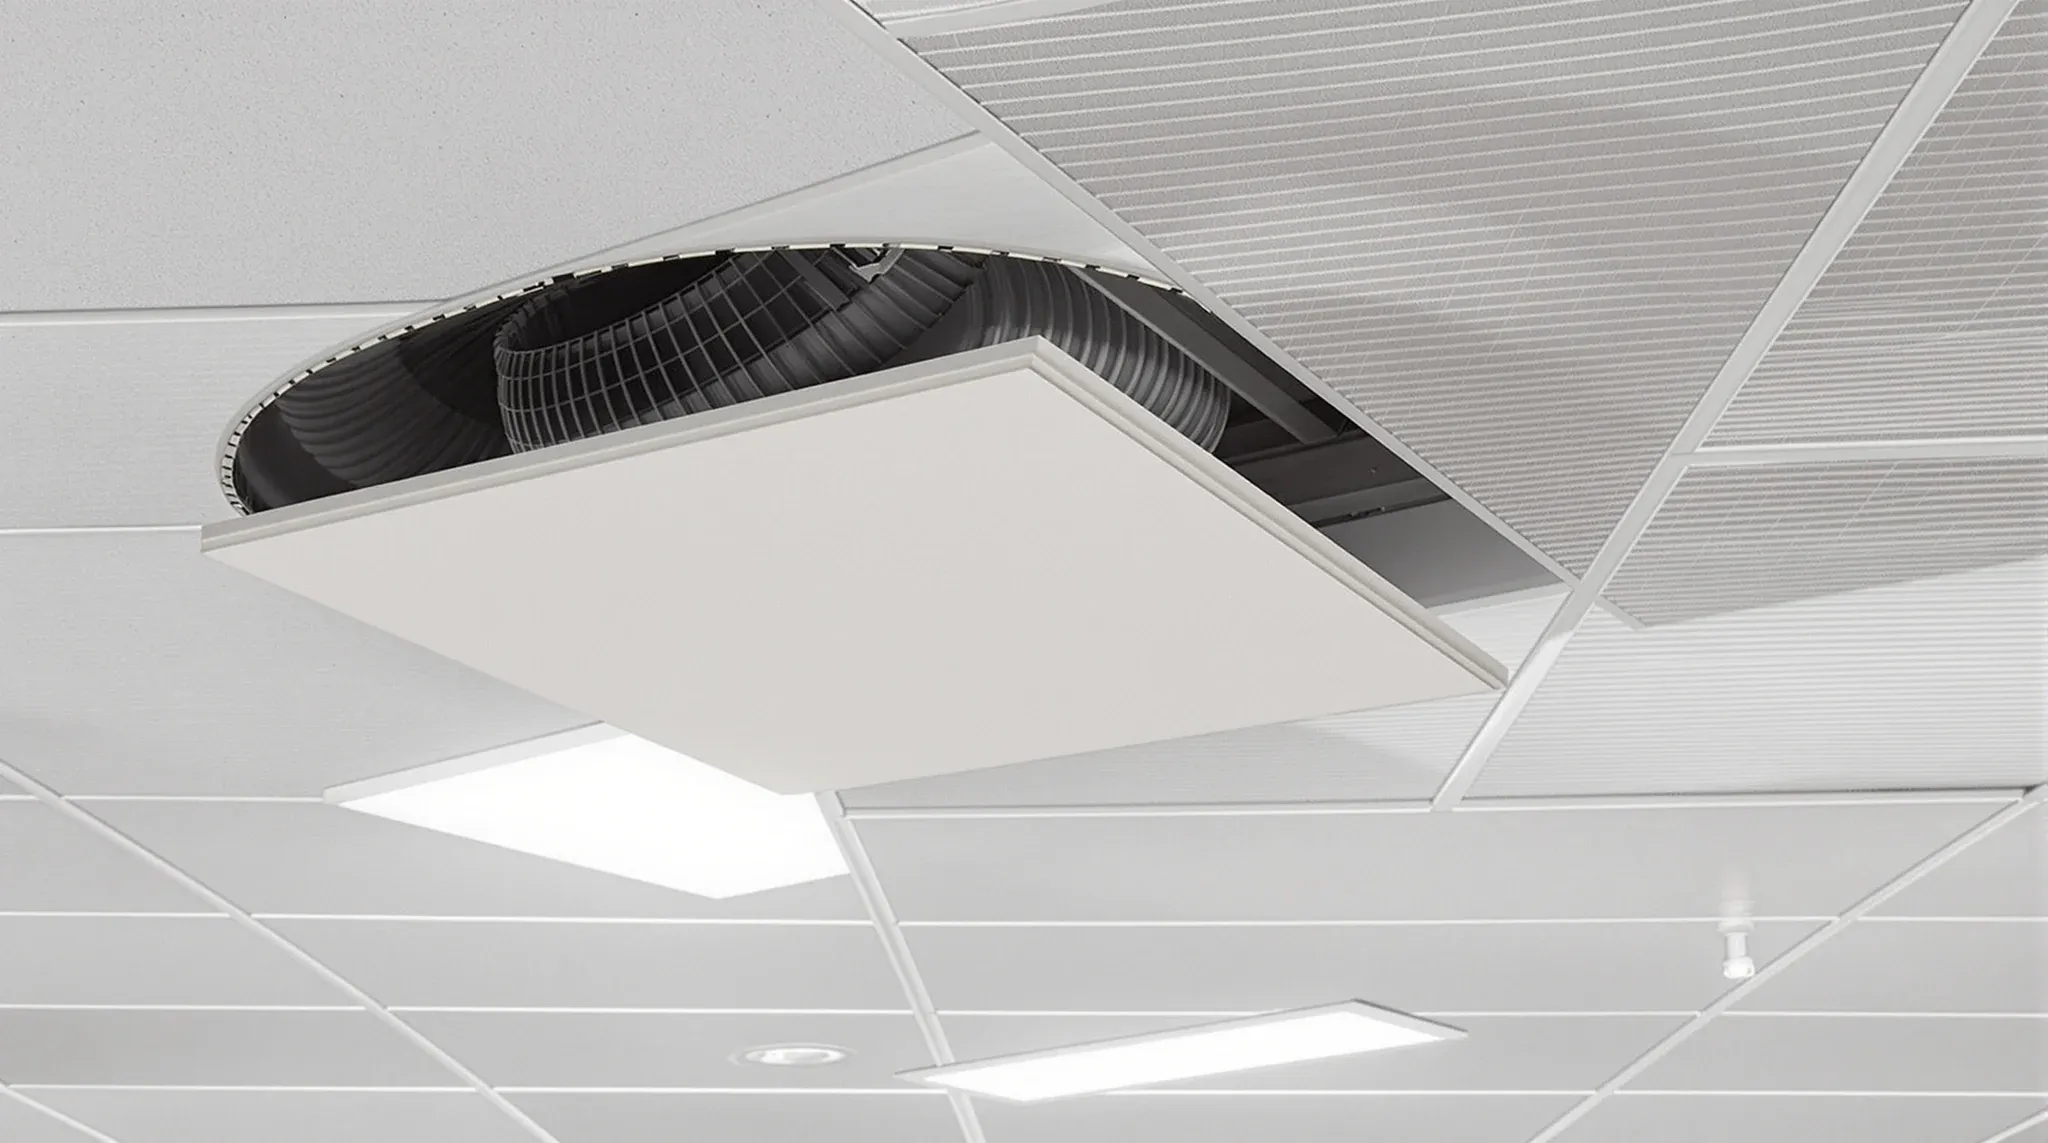
Office ceiling tiles come in two sizes in almost every Australian commercial tenancy, 1200 x 600 mm and 600 x 600 mm, and neither is a tile decision. The size is set by the grid of steel tees hanging from the slab, the tile is made to drop into that grid, and everything else in the ceiling, the light fittings, the air diffusers, the sprinkler heads and the cable tray, is sized and positioned around the same module. Understanding the ceiling means understanding the grid first and the tile second.
What we measure on site before pricing any ceiling work is the module, the face width of the tee, the edge profile of the tile and its thickness, because those four things decide whether a new tile will sit flush in an old grid and whether a fitting will land in a cell.
The Grid Module and How It Is Set Out
An exposed grid is a set of main tees running one way across the room, with shorter cross tees locking into slots in the main tees to close the cells. In the Rondo DUO system, one of the common exposed grids on Sydney floors, main tees come in 3600 mm lengths and are spaced 1200 mm apart, and cross tees come in 1200 mm and 600 mm lengths. Cross tees at 600 mm centres between the mains give the 1200 x 600 module, and a second set of 600 mm cross tees splitting each of those cells gives 600 x 600. The slots in the main tee are punched every 100 mm, so the same tee stock builds either layout.
The grid is set out from the middle of the room so the cut tiles at the two opposite walls are equal, and it is aligned with something the eye reads, usually the glazing line or the long axis of the floor. A grid started from one wall leaves a full tile on one side and a sliver on the other, and every partition, light and diffuser added later inherits the offset.
The perimeter is a steel wall angle, 25 mm deep by 19 mm wide in the DUO range, fixed to the walls at 600 mm centres or closer, with the cut tiles resting on it. When a floor already has a grid, the module and its setting-out are inherited by everything we do afterwards, so the choice between the two tile modules is made once, at the first fitout, for the whole floor.
Why a Tile Is Smaller Than Its Cell
A 600 x 600 lay-in tile is not 600 mm square. The manufacturer makes it a few millimetres under the module so it can be tilted up through the opening and lowered onto the flanges of the tees, and the same is true of anything else that lays into the grid: a Holyoake swirl diffuser made for a lay-in ceiling has a 595 x 595 mm face for exactly that reason. The flange of the tee carries the tile on all four sides, and the visible face of that flange is what the tile edge has to suit.
Two face widths cover the exposed grids we see. The 24 mm face is the general-purpose grid and the more common of the two. The 15 mm face is the slimmer grid used when the ceiling is meant to read as tile with a fine line between, and it is usually paired with a tegular tile rather than a flat one.
Tile thickness sits in a narrow band. Armstrong's Fine Fissured tile is 15 mm, Dune is 16 mm and Dune Max is 20 mm, and Rondo's tile hold-down clip is made for tiles between 10 mm and 16 mm. Thickness matters when tiles are being swapped because a thicker tile with a tegular edge drops further below the grid, and a mix of thicknesses across one field shows as a change of shadow along the tee.
Edge Profiles: Board, Tegular 24 and Tegular 15
The edge of a tile decides how it sits and how it lifts. A board edge, also called a square edge, is a plain cut on all four sides. The tile rests flat on the flange, the grid face is fully visible, and the tile pushes straight up and out of the cell from below. It is the cheapest edge, the easiest to handle, and the default across open-plan floors.
A tegular edge has a rebate cut around the underside so the body of the tile drops below the grid and the flange sits in the rebate. From below, the tile face is proud of the tee and the grid reads as a recessed line rather than a flat strip. Armstrong makes the same tile in Tegular 24 for the wide grid and Bevelled Tegular 15 for the slim grid, and the two are not interchangeable: a Tegular 24 rebate is cut to clear a 24 mm flange, and it sits loose and crooked on a 15 mm tee.
Tegular tiles need more care to lift. Because the body hangs below the grid, the tile has to be pushed up until the rebate clears the flange, then tilted and drawn through the cell diagonally, and a corner catches on the tee if the angle is wrong. In a corridor or near a door, where the ceiling gets lifted regularly for access, board edge tiles are the more serviceable choice. Where a concealed grid has been used, the tiles are hooked or splined into the tees and access works differently again, which is one of the things that separates the three suspended ceiling grid types when a floor is being planned.
What Lives in the Void Above the Tiles
Between the tile and the slab is the ceiling void, and in most office buildings it is a crowded place. Working down from the slab, there are the hanger rods or wires that carry the grid, the main air duct and the flexible ducts that run from it to each diffuser, the cable tray carrying power and data to the floor, the sprinkler main and the branch pipes to each head, the conduit and flex feeding the lights, and often the insulation, acoustic blankets or partition heads that stop sound crossing between rooms through the void.
The grid itself is suspended on rods or wires from brackets fixed to the slab. In the DUO system the hangers sit at no more than 1200 mm centres along each main tee, with the hangers nearest a wall no more than 300 mm from it. A sag in a tee usually means a hanger has been cut or bent by a trade working overhead.
The void is shared, and nothing in it belongs to the ceiling contractor alone. Flexible duct droops over the top of tiles when it is longer than the run needs, cable tray gets laid directly on the grid when the tray brackets are too far apart, and a sprinkler branch fixed to a main tee loads the grid in a way it was never designed for. When we take on suspended ceiling works, the first thing we do above the tiles is check what is resting on the grid rather than hanging from the slab, because that decides whether the ceiling can be levelled and whether the tiles will lie flat.
How a Tile Is Lifted and Put Back
Lifting a board edge tile is a two-hand job from a platform or ladder: the tile is pushed up at one edge, tilted, and drawn through the cell so it can be laid on the neighbouring tiles or passed down. Putting it back is the same in reverse, with the tile lowered diagonally and settled onto all four flanges. A tile that will not sit flat is nearly always fouled by something in the void, most often a flexible duct or a cable lying across the top edge of the cell.
Tiles at the edge of the field behave differently. The cut tiles against the wall angle are often a narrow strip that flexes and breaks when it is lifted, and a tile with a downlight or sprinkler head cut through it cannot be lifted at all without disconnecting the fitting. When we plan access into the void for another trade, we route the openings through full, unpenetrated tiles and leave the cut and fitted tiles alone, which is the same thinking behind cutting in new AV cabling through a ceiling that has to be reinstated afterwards.
Hold-down clips change the picture. They spring over the tile edge and hold it to the flange so that air movement or a door slamming cannot lift the tiles and drop them, and they are common near entries and in rooms that see positive pressure. A clipped tile has to be released from above or with a tool before it can be lifted, so clipped areas are the wrong place to plan a routine access point.
Tiles lifted for access rarely go back as new. The face marks where hands held it, the edge chips where it was drawn across the tee, and a tile lifted more than a few times is usually replaced rather than reinstated. Where a floor has had a lot of trade traffic through the ceiling, the marked tiles along the corridors are where the decision between patching tiles and full renewal is made.
Matching Old Tiles in an Existing Ceiling
Matching a replacement tile to a field that has been in place for a decade comes down to four things, and a miss on any one of them shows from the floor. The first is the pattern. Tile ranges are discontinued and reissued, and a fissured or perforated face from an earlier generation of the same product does not read the same as the current one under office lighting.
The second is the edge. A board edge tile dropped into a field of tegular tiles sits flush with the grid while its neighbours sit proud, and the reverse is just as visible. The third is thickness: a 20 mm tile beside a 15 mm tile changes the shadow line even when the faces match. The fourth is colour. Factory white drifts with the paint batch, and old tiles yellow unevenly, with those nearest the windows and the heating outlets furthest from the original.
When the match is not available we treat the ceiling as zones. New tiles go in as complete rooms, corridors or bays bounded by a partition line, and the lifted old tiles from those areas become the spares for the rest of the floor. A single new tile in the middle of an open-plan field is the one placement that will always be seen, and it is the placement we avoid.
What Changes When Lights and Services Move
Every fitting in a grid ceiling either lays into a cell or cuts through a tile, and the two cases are built differently. A 1200 x 600 troffer or a 600 x 600 LED panel is made to lay into the grid as a tile does, resting on the flanges and taking the place of one full tile, and a diffuser with a lay-in face does the same. Moving one of those fittings means moving it a whole cell at a time, and the change is clean as long as the new position is a full cell and not a cut tile against a wall.
Weight is the constraint that gets forgotten. In the DUO tables, a 24 mm grid on the 1200 x 600 layout carries an allowable load of 14.2 kg per square metre and a maximum light fitting weight of 10 kg per fitting, with lower limits on the lighter cross tee. A fitting above that weight needs its own hangers to the slab adjacent to the cell, and Rondo's guide asks for additional hangers next to a fitting where none exist. A row of heavy fittings hung on the grid alone is the usual reason a line of tees sags along a corridor.
Downlights, speakers, sensors and sprinkler heads cut through the tile instead. Each hole makes that tile a fixed tile, one that cannot be lifted without unfixing the device, and one that has to be cut again if the ceiling is replaced. When a new lighting layout is being set out, we ask for the cut-through fittings to land in tiles that are not on the access routes, and we keep the diffusers and troffers in full cells on a regular rhythm so the grid still reads as a grid once the fittings are in.
Where partitions meet the ceiling, the grid module sets the wall positions as much as the floor plan does. A partition head that lands on a tee line is finished cleanly; one that lands mid-tile means a cut tile on both sides of the wall and a tee that has to be trimmed. A room laid out to the tees rather than to the tiles keeps its ceiling intact through every later change.
We price and build office ceilings across whole tenancies and single rooms, and where a floor has a tired or mismatched grid we sequence the tile replacement and the fitting relocations together so the field, the lights and the void are dealt with in one pass.
📞 Call us on 1300 60 93 93